Tuesday, April 7, 2015

A Bond Between Strangers (Boudoir Couloir)

There's no point in denying it: Horseshoe Mountain's Boudoir Couloir is a flat-out classic. I'd already climbed it in 2011 as one of my first snow climbs, but when Speth suggested it for this weekend, I had no qualms about returning. This April is all about getting into shape for the Skillet Glacier, anyway. If a route has snow and vertical gain, I probably won't say no.


Boudoir Couloir is the obvious snow line left of center.

We were forced to park about a mile short of the standard starting point at Leavick due to lingering snow. A few poor souls had tried to drive a bit farther. Carnage ensued. Three-foot-deep tire tracks, busted wooden boards, a wrecked tow strap and, of course, their abandoned vehicles. All that to avoid walking an extra five minutes. Human nature is a funny thing.

Speth and I were walking by about 7:30 a.m. My memory had blocked out the difficulties of the approach, and for some reason I thought it would only take us about an hour to reach the base of the couloir. In reality, including the extra slog to Leavick, it took us three. A little less than a mile from Leavick is a road that branches off left and crosses Fourmile Creek. Follow it as it switchbacks up a couple hundred feet to break treeline, then make a straight shot for Horseshoe's namesake amphitheater. Many options exist to reach the base of the couloir. Gerry Roach's guidebook suggests angling to hiker's right around two small lakes. As the lakes remained solidly frozen, we took a more direct line straight across.


On the final approach. (Photo by Matt Speth.)

We reached the base of the couloir around 10:30 a.m. I'd normally be nervous about starting an east-facing spring snow climb so late, but the temperatures were mild and a stiff breeze kept everything firm. Speth hadn't even used snowshoes for the approach. While gearing up with crampons, helmets and ice axes, we were joined by fellow 14ers.com members BKS (Brian) and eskermo. Brian also had his 2-year-old labradoodle, Charley.

Being an English nerd, I was absolutely tickled by the company of a poodle named Charley. Surely his owner must be a Steinbeck fan? Actually, no -- it was a total coincidence. Charley was a joyful companion, and I used the encounter for the title of this blog entry. If you don't know what I'm talking about, famous novelist John Steinbeck (Of Mice and Men, The Grapes of Wrath, East of Eden, etc.) wrote a travelogue in the 1960s about a year-long road trip across America with his full-size poodle, Charley. Travels with Charley is one of my favorite travel books. Contained within is the quote, "Dogs are a bond between strangers." How true is that?

We started switchbacking up the apron on perfect snow. Our boots were sinking in to about lace-level and the crampons bit hard. It was much more relaxing than the first time I'd climbed Boudoir on bulletproof névé.

An intermittent old boot-pack existed in the middle of the couloir. I tried to use it at times, but given the moderate angle and great snow conditions, switchbacking was much more efficient.


About halfway up.

Me, nearing the constriction. (Photo by Matt Speth.)

A truly unique amphitheater.

Speth gives a thumbs up near the top. (Photo by Matt Speth.)

Charley, Speth and Brian approach the summit plateau.

In addition to being an aesthetic line, what makes Boudoir special is the spectacular setting. Horseshoe Mountain's entire east face is a half-moon of near-vertical cliffs. Boudoir offers the only easy passage. Rest breaks were passed giddily spying other potential snow, ice and mixed lines in the breathtaking amphitheater.

What else makes Boudoir a must-do? The direct finish over a mini-cornice onto the summit plateau. Immediately above the exit is a remarkably intact old mining cabin, which we crawled inside to escape the increasing wind. Views of the Sawatch, Sangre de Cristo, Tenmile and Mosquito ranges did not disappoint. We ditched our packs and most of our gear inside the cabin before strolling over to tag the true summit.


Mining cabin on the summit.

Every mountain should have a wind cabin.

Travels with Charley.

Group on the true summit.

Normally I would have suggested walking off the standard Northeast Slopes route, but the Skillet Glacier will require downclimbing snow up to and including 50 degrees. I figured I might as well practice walking down moderate/steep snow as much as possible. It was still a bit firm for easy plunge-stepping. Once we were through the constriction and the angle began to relent, we popped off our crampons and glissaded the rest of the way in a matter of minutes.


Walking down. (Photo by Matt Speth.)

One last look at Boudoir. Until next time!

We followed our tracks out and reached the car only two hours after leaving the summit. Glissading is awesome. The wind had even kept the snow remarkably firm for an April afternoon. No waist-deep postholing in snowshoes necessary. A perfect spring day. We did have a bit of difficulty finding a dining option in Fairplay given the Easter holiday and my low-carb kick this month, but we eventually settled in at McCall's Park Bar. Let's just say a 1/4-pound buffalo burger with no bun and a side salad is no match for a post-hike appetite. It's going to be a long month...

Thanks for reading.


Tuesday, March 17, 2015

Dawn Sessions: Coors Lite Before Work

The idea bloomed as soon as I saw the 10-day forecast. Highs in the 60s and 70s would likely spell the end of waterfall ice-climbing season, and I wanted a few final sticks.

Speth, John and I had “discovered” the ice in Clear Creek Canyon the prior weekend while driving home from a horrific experience on wilting Silverplume Falls. After traveling 1.5-2 hours to different climbing destinations all winter, I felt a little silly at never having explored the roadside ice a mere four miles from downtown Golden. Worried that the heat wave would melt everything before my next day off, I pinged the usual suspects to see if there was anyone else desperate enough to try pre-work ice climbing.

Initially, there wasn’t.

(I work in Golden and most of my partners work in Denver, so it was admittedly an easier proposition for me.)

Keegan, as usual, came to the rescue. He was freshly returned from a month abroad, and I knew he’d be jonesing to get on any remaining ice. I drove up Clear Creek Canyon on my lunch break, snapped a few pictures and forwarded them along. It was an instant sell. A few minutes later he responded inquiring about the start time and what gear he should bring.

We met at 6:30 a.m. It took longer than anticipated to put on our gear and walk to the base of the climb, called Coors Lite. It was a few minutes after 7 a.m. by the time Keegan started up, with a painted sunrise illuminating the gunsight-like view down canyon.

Sunrise toward Golden from the belay.

The first pitch of Coors Lite comprises three near-vertical steps, the first of which is the tallest at about 20 feet. The second and third only require a couple moves. We caught the ice in surprisingly decent condition, especially on the first step. Keegan topped out after placing only three screws, built a belay and brought me up. 

Keegan at the anchor, belaying from above.

On the third step. (Photo by Keegan.)

We were hoping to check out the second pitch, or at least complete another lap on the first. Unfortunately, we’d already run out of time. I had to be at work at 8 a.m., which is about the time we got back to the cars. Oops. I straggled in 15 minutes late, stayed a bit later than normal and began plotting an earlier return the following morning.

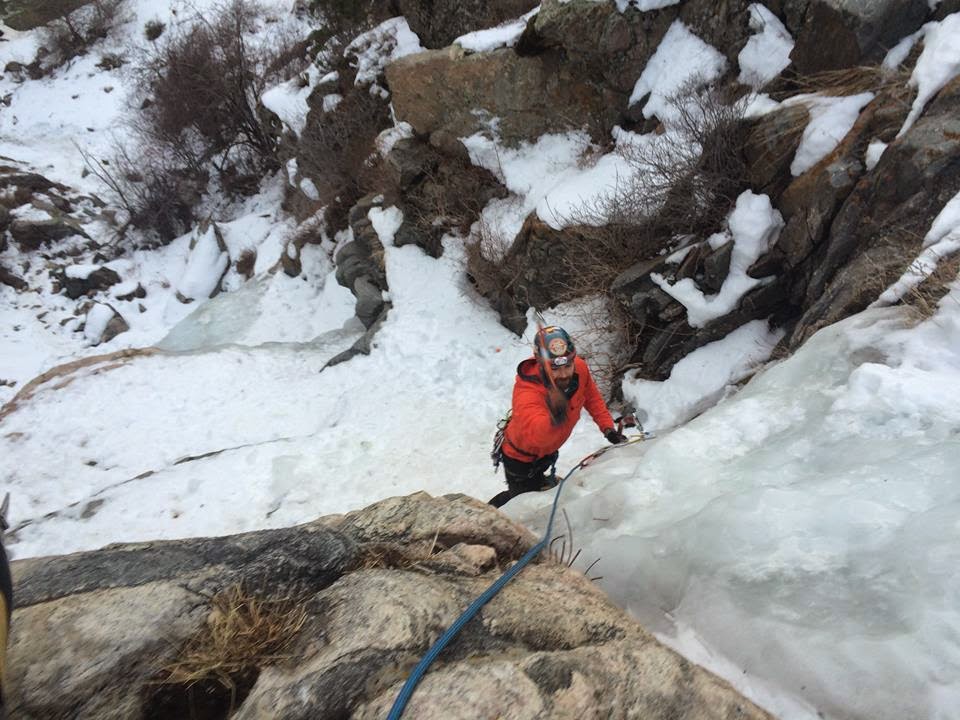
Sam was my partner for Friday. We met at 6:15 a.m. and got going as quickly as possible. It was my turn to take the sharp end, only the second time I’ve led ice. The first was a few weeks ago on a short WI3 bulge at Zapata Falls. Though separated into three tiers, Coors Lite is a significantly longer pitch. There was also much more running water than the previous day. I was admittedly nervous, but tried to rack my harness and start taking swings before my mind fully awoke.

Second lead. (Photo by Sam.)

The fear was soon replaced by the joy of climbing. I sunk two decent screws into the initial step and another more dubious one at the base of the second. The middle step ended up being the crux. There was more running water than ice, and even the solid placements I could find were thin. Luckily, there were good bucket-steps for my feet and I was able to move up using careful balance and equally weighted tools.

I placed a fourth screw in the first thick-looking slab I could find on the flat ground between the second and third steps. The third vertical section was also thin and wet, but came with better protection. I put a fifth screw in a thick bulge and finished to the two-chain anchor.

Of course, I hadn’t climbed nearly as fast as Keegan. By the time Sam joined me at the anchor, it became apparent we’d both need to skedaddle in order to make it to work on time. I didn’t want to be late two days in a row. Sam trotted down the walk-off to sort gear at the base while I rigged a quick rappel; my line was going to stay in place for a few other friends, who had started the morning at nearby Mickey’s Big Mouth, to come top-rope.

Sam on top of the first step.

Rappeling to the base. (Photo by Sam.)

It was a whirlwind effort, but I sat down at my desk just as the clock ticked over to 8 a.m. Speth, Mike, Ben, Andrew and John kept on climbing for a few hours at Coors Lite and Mickey's. Lucky bastards. Extra special props to Andrew, who was ice climbing for his very first time.

Waking up a couple hours early for two days in a row was a pain, but I’m damn glad we went. I doubt the ice was still there Saturday, and with 80-degree highs both Sunday and Monday, it’s definitely gone now. Time to figure out how to not suck at rock climbing and get in shape for summer hiking. Oh, and then there’s that glorious spring snow...


Wednesday, February 18, 2015

Third Time's the Charm on Mt. Princeton

MOUNTAIN: Mt. Princeton (14,197')
ROUTE: East Slopes
RT GAIN: 5,400'
RT DISTANCE: 13.25 miles
RT TIME: 10.75 hours
PARTNERS: Jerry, Adam, Shawn, Joel

Mt. Princeton had become something of a winter nemesis. I tried it in early January 2014 prior to shoulder surgery, but the recurring dislocations that necessitated said repair left me woefully out of shape. I only made it as far as subsummit "Tigger Peak," a mile or two and nearly 1,000' short of the summit. Princeton was also the plan three weeks ago, but I was forced to bail last-minute for a variety of reasons.

Third time's the charm, right? I roped a few poor souls -- Shawn, Joel, Adam and Jerry -- into yet another winter attempt Sunday, Feb. 15. Most of the Colorado high country still looked more like early fall than mid-February, and with the weather pattern changing toward more frequent snow beginning this week, I figured I better poach an easy winter summit while the option remained.


The group started from the lower trailhead at 6:45 a.m., faced with a few miles of road walking before reaching the standard summer starting point. Snowshoes weren't necessary and the distance melted away. As the day grew warmer and the sun burned off the early-morning clouds, some of us even found ourselves in baselayers. Of course, with a storm scheduled to roll in during the afternoon and high winds obvious up high, we knew it wouldn't last.

The rest of us caught up to Jerry, who'd dashed ahead at superhuman speed, at the only real decision point we'd face all day. The road continues to above 12,000', but the summer route leaves it on a good trail that traverses across the face of "Tigger Peak" to the low point in the saddle between "Tigger" and Princeton. Most winters, avalanche danger dictates forgoing the summer trail and going up and over "Tigger" instead, at the expense of some extra mileage and about 800' of added elevation gain. The minimal snow levels convinced us to take the easier option and stick to the trail.


The "easier option" was still kind of a pain. The Mt. Princeton trail consists of large, loose, annoying talus. Add a foot or two of powder on top of it and the going becomes very slow and tedious. Jerry continued leading the way as the weather began its preordained decline.

Princeton's summit looked tantalizingly close. Almost every winter trip report I read had a huge round-trip time that didn't align with the 13.25 mile/5,400' stats. Sometimes it even took people 20+ hours! Now, I understand why. Most of terrain above 12,000' is simply horrid. If we'd had to deal with trailbreaking in snowshoes and going over "Tigger," it likely would have taken us much longer as well. The path becomes more and more intermittent, replaced with steep scree, loose talus and ankle-breaking murder holes. The final push to the summit took about twice as long as I expected at first glance. We finally topped out, one after another, between 1-1:20 p.m.

The forecasted storm was arriving in earnest. I stayed on the summit only long enough to eat a sandwich and snap three pictures. No one else bothered. Clouds and light snow had already rolled in, with the wind whipping around at 30 or 40 miles per hour.


On such hideous terrain, the descent took almost as long as the climb. I think we all wanted to kneel and kiss the ground when we were finally back on the solid trail. As nice as that was, regaining the road was even better. We rested for a while at the junction to eat, drink and adjust layers, tasks we'd neglected for a few hours in the deteriorating elements.

Thus replenished, the stroll down the road was lighthearted and victorious. The storm produced a veritable whiteout at times, with an inch of snow falling per hour and visibility reduced to a couple hundred feet. Safely on the road, however, we had little to worry about. We spaced out a bit, with the last person returning to the vehicles around 5:30 p.m. It's not often you can do a long winter daytrip without needing a headlamp. Not to say we were especially quick -- just lucky with the conditions.


We tried to stop at Eddyline Brewing for a post-climb meal, but shockingly there was a 45-minute wait on a Sunday night in the middle of winter. We instead visited a Mexican joint down the street on Joel's excellent suggestion, which hit the spot just the same. Thanks to Joel, Adam, Jerry and Shawn for a fun day. Now, back to ice climbing...

Wednesday, February 11, 2015

Ice Ax Buyer's Guide

So, you’ve decided to get into winter mountaineering. Forget that you’d benefit exponentially more from snowshoes, trekking poles, a softshell, goggles, a pair of mittens or myriad other essentials – it’s time to get sexy with it. There’s no faster way to decorate your pack and impress your friends than purchasing an ice ax.

Choosing your ideal ax can be daunting. They come in many different shapes, sizes and, most importantly, colors. Depending on the kind of climbing you plan to pursue, do you need a traditional piolet, all-around ice tools, wickedly curved mixed tools, or a highly specialized hybrid? The answer is almost assuredly some sort of combination. It took me three years and a few wasted Benjamins to arrive at my ideal quiver, and now that I have a decent grasp on the ins and outs of the ice ax market, here’s a gentle rundown of what’s out there.

The Traditional Piolet


Characterized by a long, straight shaft and a pick with a positive curve (envision a rainbow), piolets are the old guard of the ice ax world. Almost everyone owns one, whether you’re Noob McSelfie or Ueli Steck. Excepting steep, technical routes, this is all you need for winter/spring 14ers, the standard routes on most Pacific Northwest volcanoes, El Pico de Orizaba, the West Buttress of Denali and so on. If you’re reading this because you’re in search of your first ice ax, you likely need a piolet. I believe that's French for backpack ornament.

Of course, it’s not that simple. Every brand brings something a little different to the table. They range in size from 50cm to upwards of 75cm. Some have a hammer, some have an adze. A few have rubber grips and pinky rests. What exactly is all that used for, and what do you need?

Let’s start with size. When holding a piolet in self-arrest grip (read Freedom of the Hills or take a class), you should just be able to touch your ankle bone with the spike. If you’re torn between two different sizes, I recommend going shorter. A trekking pole is a better option in most situations where you’d want a longer ax, and shorter shafts are easier to wield on steep terrain.

Keep your piolet as simple as possible. Rubber grips, pinky rests and bent shafts are best kept on technical tools and hybrids. These other options, which I’ll dive into next, will also likely have a hammer. For that reason, I suggest getting a classical ax with an adze.

Most outdoor retailers will carry three or four different brands of straight-shafted piolets. The truth is, other than what color matches your pack the best, there’s not much difference. Hold them in your hand, swing them around, decided how much you’re willing to spend and pick whichever tugs at your heart strings.

The All-Around Ice Tool


The three big differences between an ice tool and a piolet are a curved shaft, a radically shorter length and a pick with a reverse curve (imagine, well, an upside-down rainbow). Don’t let the “all-around” title confuse you; these are meant for ice climbing. They can perform the functions of a traditional mountaineering ax in a pinch, but nowhere near as effectively. Trying to self-belay or self-arrest with an ice tool is expert-only stuff.

You should buy a pair of all-around tools if you want to (duh) go ice climbing, or a single all-around tool to pair with a piolet or a hybrid if you see semi-technical routes in your future. Comfort levels vary from climber to climber, but once a slope angle noses over 50-55 degrees, I prefer to have a second tool in addition to my piolet. One piolet/hybrid and one ice tool is the system of choice for classic routes such as the Kautz Glacier or Liberty Ridge on Mt. Rainier, the Adams Glacier on Mt. Adams, the East Slope of Mt. Bross and so on.

The reverse-curved pick is super grippy, even if only plunged into ice a few millimeters. The downside is this stickiness also applies when trying to self-arrest. If your technique is off, the tool is likely to get ripped out of your hands and become a flailing projectile hungry for puncture wounds.

As mentioned above, I strongly suggest ice tools with hammers. An adze is dangerous on ice or mixed routes, where a popped tool’s most likely landing place is your upper lip. Hitting yourself in the face with a hammer might be unpleasant, but hitting yourself in the face with a glorified knife is a hospital visit and a significant other who might never look at you with the same lustful gaze. In situations where an adze might be desirable, which are rare to begin with, you’re likely going to have a hybrid or a piolet along as well.

The best advice I can give for purchasing ice tools is to demo as many as possible before investing. The weight, swing angle and grip can wildly differ between tools that look more or less the same. Figure out your preferences before being stuck with a $500 pair that, to you, feels like swinging wooden clubs coated in bacon fat.

The Mixed Tool


Welcome to the second-briefest entry in this blog post. A mixed tool is an all-around tool on steroids. The curves on the shaft and pick are more wicked, the handles are beefier and the people that use them effectively are the demi-gods of the climbing world. If you’ve read this far, you probably don’t want or need mixed tools. These are used for scraping up blank rock faces with the occasional smear or pillar of ice. Most lack both an adze and a hammer for the face- and relationship-destroying reasons discussed above.

The Hybrid Tool


I’ve used the term “hybrid ax” about a half-dozen times now, and they’re the most confusing category in the modern ice-ax market. In general, they are a cross between a piolet and an all-around ice tool. Gear companies have the freedom to be creative here. The design elements and included features vary considerably from brand to brand, and not all hybrid tools are created equal.

Speaking generally, a hybrid tool is shorter than a traditional piolet, has a slightly bent shaft and includes some sort of feature that makes it easier to swing like an ice tool, such as a rubber grip or a pinky rest. They come both with positive- and negative-curved picks, with some brands allowing for these to be interchangeable. Because hybrids are meant for more experienced climbers with developed preferences, I’ll leave the adze vs. hammer and positive vs. negative curve decisions up to you. I personally like my hybrid tools with an adze and a positive pick.

These are best for routes where you’ll be spending a lot of time on steep terrain and most people would prefer two ice tools, but there’s also a long easy-angled approach. Think glaciers. A hybrid won’t arrest, plunge or act as a cane as well as a piolet. It also won’t climb steep ice as well as an ice tool. What it does do is provide a bridge over the gap when you can’t decide which of those others to bring.

Hybrid tools carry more street cred than a traditional piolet and benefit from slick marketing campaigns, meaning many beginners skip straight to them. That’s fine, especially if you see yourself quickly moving into more technical routes, but understand that hybrids are generally much heavier and more expensive than a piolet.

My preferred system for AI2-3 glacier routes or very steep (55+ degree) snow routes is a medium-length (57-62cm) hybrid paired with an all-around ice tool. If I’m doing a more traditional snow climb, I save weight and bring my piolet at the expense of not impressing as many trailmates.

The Red-Headed Stepchildren


Innovation is required to stay at the forefront of the outdoor industry. There are many piolets and ice tools that don’t fit into any of the above categories. I’m looking at you, Grivel. CAMP USA also makes several featherweight options designed for ski mountaineering, adventure racing and high-altitude. Once again, if you’re in the market for one of these specialized tools, you probably quit reading about 1,000 words ago.

For the record, my quiver:
  • 65cm Black Diamond Raven (piolet)
  • 59cm Petzl Sum'tec (hybrid w/ adze)
  • 50cm Cassin X-All Mountain x2 (ice tools)

Happy shopping!

Friday, January 16, 2015

Top 5 Colorado Mountain Towns (for Dirtbag Climbers)

One of the biggest perks of pursuing 14ers and 13ers is having an excuse to range far and wide across Colorado. Little towns that even natives haven't heard of become favorite haunts, complete with their hole-in-the-wall restaurants, obscure festivals, historic sites, quirky attractions, sunny patios and small-batch breweries. When you exit ski country, you enter the real Colorado. 

I'm daunted by even the thought of trying to tally how many road miles I've logged in-state over the past four years. Hiking and climbing nearly every weekend, let's just say I've gotten to know Colorado fairly well. The only criteria I have for the following list is the question, "Which towns do I look forward to visiting, time and again, even as much as the surrounding summits?" This mostly boils down to mountain access, nearby free camping areas and quality of local restaurants and breweries.

No ski area = bliss.

The List


1. Ouray
The undisputed champ. Any ranking of Colorado mountain towns that doesn't start with Ouray is invalid. It has the world-famous Ouray Ice Park; access to the most beautiful mountains in the state, including the 14er Mt. Sneffels; several hot springs; affordable lodging and tons of camping; a smorgasboard of charming coffee shops and restaurants; and my second-favorite brewery in Colorado. For those of you exclaiming how much you also love the Ouray Brewery -- pipe down. That place is serviceable, but the Ourayle Brewery, also known as the Mr. Grumpy Pants Brewery, blows it out of the water. The fact that most people go to Ouray Brewery and overlook Ourayle just adds to its allure. Ourayle has what I'd argue is the best atmosphere of any bar in the state -- as long as you can appreciate sarcasm and take a joke. Also, don't be a Beermadonna. Other awesome establishments include O'Brien's, Backstreet Bistro, Mouse's Chocolates & Coffee and Goldbelt Bar & Grill.

Ouray Ice Park

2. Durango
I placed Durango here largely because of its size. It's a mountain town big enough that the average city-dweller would feel comfortable living there, at least for a year or two. It has all the amenities, a large regional airport, raucous nightlife and enough climbing to occupy several lifetimes. It's also the basecamp for most everyone venturing into the recesses of the Weminuche, Colorado's best wilderness area. I mentioned Ourayle as my second-favorite brewery, and the only one to top it -- Ska Brewing -- resides in Durango. Steamworks also has great beer in addition to some of the best pub food I've ever tasted. A trio of top-notch outdoor shops, dueling sushi restaurants, a hidden used bookstore and a variety of watering holes solidify Durango's ranking.

The Mecca.

3. Buena Vista/Salida
I know, I know, they're technically two separate towns. From a climber's perspective, they're one and the same. The surrounding Sawatch Mountains are regarded by most hikers as boring lumps of talus, but there are a lot of them, and the towns at their foot are a dirtbag's dream. There's so much dispersed camping in the area I find a new spot nearly every time I visit. The presence of Elevation Beer Co., Eddyline Brewing and the Boathouse Cantina make choosing an apres-climb stop difficult. Best of all, this area is only two hours from Denver. These are the two mountain towns I find myself in most often, and you won't catch me complaining.

Free dispersed camping outside of Buena Vista.

4. Lake City
This town could be described as Ouray's little brother, and that's not a bad thing. What Lake City lacks in size and amenities, it more than makes up for in character. This town has a fledgling ice park complete with an annual Ice Festival the first weekend of February. It's one of the highlights of my winter. Whereas the Ouray Ice Festival is a bit of a spectacle, the Lake City Ice Festival is a grassroots gathering of the tribe for beginners and crushers alike. Though Lake City tends to be overrun with Texans in the summer, it's worth wading through the sea of ATVs for access to many of the state's best high peaks. There's limitless free camping in the area, and even a hostel for the dirtbag with delicate sensibilities. Must-stop establishments include Poker Alice, Mean Jeans Coffee Shop and Packer Saloon.

Sunrise over Uncompahgre Peak, the monarch of the San Juans.

5. Silver Cliff/Westcliffe
These sister-towns are the gateway to the east side of the Sange de Cristo Range. There honestly aren't many notable attractions within the city limits, but the views are breathtaking, the amount of nearby trailheads is nearly overwhelming and Tony's Mountain Pizza has the best pies I've yet to find in Colorado. You could literally spend weeks in this area camping for free, hiking a quality 13er or 14er every day and refueling with a different pizza every night. Once someone opens a brewery here, it's game over, man. Anyone want to throw in with me?

Soaking in the post-climb views with Tony's Mountain Pizza.


Notable omissions, with reasoning:

Estes Park: Flooded with tourists, lack of free dispersed camping areas, fee required to enter Rocky Mountain National Park, only one (overloved) 14er and you have to go through Boulder to get there.

Aspen: Unless you have a trust fund...

Silverton/Telluride: Proximity to Ouray and Durango. I didn't want this to turn into a list of only mountain towns in the San Juans, which would be pretty easy. I regard both Silverton and Telluride as highly as the other Southwest Colorado entries.

Pagosa Springs: If only Pagosa had more nearby 13ers/14ers, it wouldn't just be on the list -- it would be near the top. It's a fantastic town on the borders of both the Weminuche and South San Juan wilderness areas.

Alamosa: It's the biggest settlement on the west side of the Sangres, but shockingly, you just don't go through it that often in the pursuit of summits. San Luis Valley Brewing Co. is a treat during the rare visit.

Leadville: No brewery, a kind of depressing vibe and only two passable restaurants (High Mountain Pies and Tennessee Pass Cafe). Turquoise Lake is a worthwhile weekend destination, though.

Friday, January 2, 2015

Go Panthers! ...and Broncos?

In a sea of orange, I'm tired of being a stain of black.

No, I'm not rushing out to buy a Peyton Manning jersey or changing my Facebook cover photo to “United in Orange.” The Panthers are my team. Even if I wanted to, it would be impossible to have the same passion for another.

What I mean is that I'm tired of being a hater.

The main reason I've actively rooted against the Broncos is I don’t want to be surrounded by their celebrating fans. If the Panthers are eliminated, I'd rather the eventual champion reside in some faraway corner of the country with a quiet, ignorable fanbase. Denver, like any team, has some terrible supporters. They yell insults at opposing fans, turn into raging assholes if the team plays poorly, spew uninformed rants about how PFM should win the next Nobel Prize and just generally lose sight of what's actually important in life. This subset of Denver sports fans is a tiny minority, but be honest – you can probably name a handful right now without giving it much thought.

After Carolina's playoff loss to the 49ers last year, I realized I’d become one of them.

I wasn't fun to watch football around. Friends, even close ones, publicly cheered against the Panthers because they didn't want to deal with me. I'd often wake up with feelings of embarrassment on Monday mornings. Most importantly, I'd become a poor representative of the Carolina Panthers, a sports franchise with which I have a deep and largely unrelatable connection. It's that bond I hope to attempt to explain in this post, before turning over a new leaf in my expressions of fandom. I know, I know, “it's just football.” Hear me out.

The Panthers sprang into existence just as I was entering my formative years in Charlotte, where my family had relocated only a couple years prior. Underdogs from the start, Charlotte was low on the list of cities campaigning for an NFL franchise. Thanks to owner Jerry Richardson's tenaciousness and the revolutionary idea of Personal Seat Licenses (PSLs), Charlotte pulled a major upset. The Carolina Panthers entered the league in 1995 alongside the Jacksonville Jaguars.

After an 0-5 start, Sam Mills keyed the Panthers' inaugural win.

As a 9-year-old still adjusting to a new city, one of my favorite memories is riding nearly 300 miles round-trip to Clemson, S.C., to watch the Panthers take on the defending Super Bowl-champion San Francisco 49ers on Dec. 10, 1995. The Panthers were forced to play their inaugural season there, at Clemson University, while a permanent stadium was under construction in uptown Charlotte.

My parents had divorced not long after I was born, and as a pre-teen my main passions in life were reading fantasy novels, playing video games and being as difficult as possible for my mother. That roadtrip, just the two of us, was the beginning of something special. The game was forgettable – Carolina lost 31-10 – but the experience made us both lifelong fans, and the bond between us intensified. To this day, no matter what’s going on in the world, I can count on a stream of texts from my mother during every Panthers game. Huddled under a shared blanket on metal bleachers in a half-empty college stadium in December, a mother and son found common ground. My first-ever NFL game will always remain my favorite.

The next year, the Panthers went 11-5 and made a shocking run to the NFC Championship Game. If there were any remaining doubts that The Queen City could support a professional football team, they evaporated in 1996. The city was whipped into a football frenzy. Carolina lost to the eventual Super Bowl-winning Green Bay Packers at Lambeau Field, but a new legion of fans was created, and I was one of them.

We got season tickets soon after. My mom and I went to as many games as we could and watched the rest in our North Charlotte living room. The franchise's strong start didn’t last, and we suffered through a string of disappointing seasons, including a 1-15 clunker in 2001. Hey, you have to experience the bad times to appreciate the good times. It all became worth it two years later.

It will take a Super Bowl win to dethrone the 2003 season as my favorite ever for the Carolina Panthers. In his second campaign, John Fox and newly acquired quarterback Jake Delhomme went on the most exciting and improbable playoff run in NFL history. The Panthers won close game after close game, including seven fourth-quarter comebacks to earn the nickname “Cardiac Cats.” They won four contests in overtime (of five) that season, the highlight being a double-OT victory over the 14-2 St. Louis Rams in the divisional round of the playoffs. 

X-Clown.

“X-Clown,” the play that resulted in a game-winning 69-yard touchdown from Delhomme to Steve Smith in the first play of the second overtime, will never be topped. I clearly remember lying on my living room floor in a nervous heap before the play, and then jumping and screaming and hugging my mom as Smith went the distance.

Carolina went on to lose one of the greatest Super Bowls ever played, 32-29 to the New England Patriots. The Cardiac Cats simply ran out of magic.

I graduated high school in 2004 and departed for college three hours away in Wilmington, N.C., thus ending my days as a regular attendee of home games. My mom sold off our season tickets, and a couple years later she moved to Delaware. I still watched all the games on TV, but only traveled to a handful of home games. The Panthers returned to the playoffs in 2005 and 2008, but 2003 remains their only Super Bowl appearance.

The last home game I attended, against the Bucs in 2007.

I bounced around a lot after college, from North Carolina to New Mexico to Boston and eventually to Denver. No matter where I am, the Panthers always give me something to look forward to on Sundays. A series of dismal seasons finally ended with last year's playoff berth, and honestly I think I’d just forgotten how to handle success. I was consumed by the 12-4 team and lost perspective, especially in regards to the even-better 13-3 Broncos. I was surrounded by people who only wanted to rave about the home team, while I felt my poor small-market Panthers were largely ignored.

Even worse, in my eyes, were the bandwagon fans. Denver is a city of transplants, and I watched as one-by-one, fans of other teams or people who didn't even like football slyly slipped on the orange-and-blue. I felt cheated by the fact that, if the Broncos won the Super Bowl, these first-year supporters would experience the jubilation that I've thirsted for during 20 years of Panthers football. It made me bitter, angry and spiteful. I publicly taunted my friends when the Broncos lost to the Seahawks.

In retrospect, I'm ashamed by the fact I was openly cheering for people I care about to experience sadness. Whether it comes from football or anything else in life, I should root for my friends to be happy and not let misguided jealousy hinder my relationships.

Don't get me wrong, a little lighthearted trash talk is a huge part of what makes sports fun. It just has to stop short of becoming personal. Keep the “Scam Newton” jokes coming, as long as you’re prepared for me to fire back.

A dirty little secret: I'm a bandwagon Panthers fan. Even after that first game I attended in 1995, I was split between the Panthers and the Miami Dolphins. I'd spent my youth in South Florida before moving to Charlotte, and Dan Marino was my childhood hero. It took the 1996 playoff run to fully convert me to the Panthers. So who am I to judge if someone who just moved to Denver wants to hop on the Broncos bandwagon? That's how fans are made.

Over the course of this season, I've made an effort to let go of my hate. Despite some lapses, it's been a largely successful experiment. I've stopped letting losses affect my mood (it IS just football), I've had friendly conversations with opposing fans and I've eliminated the word Sewer Dome from my vocabulary. Will I still make jokes at the Saints’ expense? Of course. I'm just trying to take the actual maliciousness out of it.

As the playoffs start, I know there are some people out there who will be rooting against the Panthers because they “don't want to have to hear about it from Golden.” That’s fine. I’m vocal, especially on social media, because I love my team. I sometimes feel my eyes get a little misty when I read about Sam Mills or watch “X-Clown” on YouTube. The Panthers remind me of home, of family, of childhood, of dozens of formative memories. They are the one thing still connecting me to my hometown of Charlotte. Posting about them is part of the experience for me, and I realize that can gett annoying, because almost no one cares about little ol' Carolina. What I do promise is that any posts will purely be celebrating the Panthers, and not putting down other teams or their supporters.

The Panthers don't have six rings or a rich history; they've yet to even record back-to-back winning seasons. What tradition they do have, however, is something I've experienced from the very beginning. I don't have to read about it in books or hear about it from my grandpa. That's pretty cool, too.

In the likely scenario the Panthers are eliminated before the Super Bowl, will I become a Broncos fan? No. But I will become a fan of the Broncos fans who enrich my life. As the poignant American History X quote goes, “Hate is baggage. Life's too short to be pissed off all the time.”


iPhone photo taken while watching the Panthers win the NFC South this year -- which I got to watch with my mom.

Keep Pounding.

Tuesday, November 11, 2014

10 Things You Need to Know for Hiking in the Snow


Most Coloradans consider "14er season" to be June through September, but such a viewpoint is severely restrictive. The fall, winter and spring months are often the most rewarding times of year in the high country. There's nothing quite like having a popular summit such as Quandary Peak to yourself, looking out over a sea of white-capped mountains as you sip hot tea that warms your body from the inside out. Like many novice mountaineers, a few short years ago I viewed the gap between summer and winter climbing as insurmountable. I had too many questions, and the answers were too hard to find. The truth is, like many things in life, it really doesn't have to be that difficult.

Kickin' back on the summit of Mt. Massive.

1. An introduction to winter layering
This was one of the most confusing aspects to me when I was starting out. Hard shell or soft shell? Down or synthetic? How many layers do I need to carry? This stuff isn't cheap, and with my limited disposable income, making the right choices was crucial. Everyone has their own system. I'll offer mine as a guide, along with the reasoning and a more general perspective.
  • Polyester/spandex short-sleeve T-shirt: Avoid anything with cotton. I don't like long sleeves here because it's uncomfortable when you're layering on top of other pieces, which are almost all long-sleeve as well.
  • Fleece 1/4-zip pullover: This is my outer layer most of the time in winter. A simple T-shirt and a fleece gets it done when I'm moving, even in frigid temperatures. The other stuff piles on only on the windiest, coldest days or when there's precipitation.
  • Midweight synthetic pullover: Down would be fine here as well, but I prefer synthetic because it might get a little sweaty if you're working hard. Synthetic insulation stays warm even when wet. I leave this one behind to save weight when the forecast is warm and dry.
  • Soft shell jacket with hood: Hard shells are fine too, but soft shells are generally more breathable. A cheap hard shell is often like wearing a garbage bag, and you want to avoid sweating as much as possible in the winter. Soft shells hold up just fine in Colorado's dry snow.
  • Down over-it-all puffy with hood: Wearing a down jacket over a shell seems kind of weird, right? It's not. I promise. This is the jacket that will stay at the bottom of your pack 95 percent of the time, but will become your best friend during long rest breaks, on summits or in an emergency situation. Don't skimp. Again, synthetic works fine, but in general down is warmer and lighter.

Down puffy as an outer layer, worn over a shell.

2. Basic avalanche education is free
Several local organizations, such as Friends of Berthoud Pass, offer free one- or two-hour avalanche awareness seminars. A proper AIARE Avalanche 1 course wouldn't be a bad idea, but as a hiker the most crucial piece of your avalanche training is learning what terrain to avoid altogether. Don't go out in the winter without at least attending one of these free classes. I highly recommend Mountain Rescue Aspen's Public Avalanche Seminar, which is held every year in January. For just $30 you get a three-hour lecture followed by an on-snow day practicing terrain recognition, beacon searches and more. Can't beat that.

3. Winter is ridge season, spring is couloir season
People often equate winter with ice axes and crampons. Most of the time, that's simply not true. You're far more likely to use snowshoes and trekking poles than technical gear. Ascending wind-swept ridgelines keeps you out of avalanche terrain. Just look out for cornices and make sure there's terra firma under your feet. Snow-climbing season typically begins in April or May, when it's time to bust out the ice ax and crampons for those tasty couloirs. Microspikes are likely all the traction you'll need in winter and snowshoes with a heel-lift and built-in crampons are the way to go for steep ascents.

The glories that await in spring.

4. OpenSnow.com and the CAIC are your friends
Check these two sites daily, even if you're not planning on heading out. It's incredibly beneficial to your overall education and awareness. OpenSnow.com meteorologist Joel Gratz provides spot-on weather forecasts and the Colorado Avalanche Information Center posts updates daily on avalanche conditions.

5. Water freezes
No duh, right? But it's shocking how often someone will be stuck four miles from the trailhead with a solid chunk of ice as their water supply. This is easily avoidable. For starters, leave the Camelbak bladders at home. Water will almost always freeze in the thin hose and block your access, even if you have an insulator sleeve. I prefer to keep a Nalgene, turned upside down, in an insulated sleeve clipped to my pack's hip belt for easy access. My other water bottles are in my pack, wrapped in extra layers and pushed against my back for the additional body heat. A bit of Gatorade powder (or vodka, for the adventurous) also protects against freezing.

6. Pluck the low-hanging fruit
Many of the same 14ers that are considered easy in August are still considered easy in January. Mt. Elbert, Mt. Sherman, Quandary Peak and Mt. Bierstadt don't require much more mileage or elevation gain than they do in the summer, and there are virtually avalanche-safe routes on each. Search the 14ers.com Trip Reports section for your intended mountain and click only the checkboxes for the winter months. There are dozens of quality TRs on the easier peaks in December, January, February and March.

Mt. Elbert summit in winter.

7. You don't need $500 mountaineering boots
Sure, they're yellow or orange or some other fancy color, and they make you feel like a badass. They're also overkill for winter hikes and surprisingly not all that warm. Run-of-the-mill winter hiking boots are cheaper, lighter, warmer and more comfortable. As long as they have insulation and come up to your ankle or above, you're golden. Such boots are even compatible with strap-on crampons. The big caveat is that you'll want at least a heel welt, and likely both a heel welt and a toe welt, if you plan to try climbing ice. Those are for attaching hybrid or step-in crampons, which are more secure. Expensive mountaineering boots are also more rigid, saving your calf muscles while standing on vertical ice.

8. The "Other" Four Essentials
The 10 Essentials list is even more important in winter, when the stakes are higher. I'd like to add four more: a thermos, a Buff, goggles and mittens. The thermos might be a luxury, but there's nothing better than hot soup or tea on a cold, windy day. I often joke that a thermos is the best gear purchase I've ever made. A Buff is a close runner-up. These little pieces of fabric have myriad uses, including as a facemask. You need to be able to cover every inch of exposed skin in the winter to prevent frostnip or frostbite. That's where the goggles come in, too. You need to see even if it's windy and dumping snow. No need to break the bank here, a simple $20-30 pair will suffice. Finally, buy a good pair of mittens. Even the nicest gloves can't compare to mittens for warmth. I recommend Black Diamond Mercury Mitts to anyone who will listen.

The agony of snowblindness.
9. The sun is your enemy
OK, not really. The warmth of the sun feels pretty damn good in the winter. It's just doubly important to have proper sunglasses and apply SPF30+ sunscreen every two hours. The sun reflecting off the snow is lethal, and if you don't take the steps to protect yourself, you're in for a world of pain. I'm speaking from experience. Pack sunglasses that cover your full field of vision (glacier glasses are best, and they're really not that expensive). Keep sunscreen easily accessible, such as in your pants pocket, to limit the excuses against applying it regularly.

10. Carry enough to survive a night out
Like a layering system, this will vary depending on a person's risk tolerance, attitude and experience. The key is being confident in your ability to live through a night in the open. For some that means a tent and a sleeping bag, for others a bivy sack, and for still others simply extra layers. I fall into the latter category. It would be far from comfortable, but I trust my down puffy (on top of all the other layers I carry) to get me through a winter night. I also carry a tarp/blanket to wrap myself in should I need protection from the elements.